If you're looking for a quick-start guide to building a Python project with Bazel, you're in the right place. Bazel is a build tool used by many of the world's largest engineering teams, especially for large-scale multi-language builds. So we thought we'd give you a leg up on learning how to adapt Bazel into your own Python projects and build flows. We'll walk you through an example of a straightforward project that uses the common patterns for incorporating Bazel into your flow, and explain what we're doing and why we're doing it as we go.
What is Bazel?
Bazel is an open-source build system originally developed by Google. It's fast and efficient and aims to support multiple programming languages (including Python) in a shared enterprise build, continuous integration (CI), and release environment. It's particularly popular because of its speed, correctness, and reproducibility.
Bazel uses Starlark, a domain-specific language for defining builds. If you spend time in a Bazel system, you'll become familiar with BUILD files, which use a declarative system to describe how software should be built. Each piece of software is a build target. Bazel owes its speed (and efficiency) to an action graph that it constructs from the BUILD files. The build system maps dependencies, adds them to the graph, and makes sure only necessary components are built for each target. Bazel provides a sophisticated set of options for configuring and running builds, including for sandboxing, caching, incremental builds, and remote execution.
WORKSPACE.bazel or MODULE.bazel?
Before we dive in too deeply, another thing to know about Bazel is that repository definitions are currently migrating from using WORKSPACE.bazel files to a newer, more declarative model that uses MODULE.bazel files instead. In this walkthrough, we'll be using the newer MODULE.bazel-based approach.
Practical guide: Let's build a Python project with Bazel
Let's dive right in and build a basic Python app and library with Bazel. (We'll assume you're pretty comfortable working with Python, so we can focus on the Bazel-specific aspects.)
The source code we're using in this post is up on GitHub, by the way:
https://github.com/buildkite/bazel-python-package-example
For the purposes of this walkthrough, you can follow along by checking out the code in your local development environment. With the GitHub CLI installed, this command should do it:
gh repo clone buildkite/bazel-python-package-example
cd bazel-python-package-example
Requirements and configuration
If you'd like to follow along and execute or write code as we go, we depend only on Bazel itself. Once installed, it'll include and manage all of the tools we need for this walkthrough.
bazel --version
bazel 7.4.1
A note on installing Bazel
Rather than installing the Bazel binary directly, we recommend installing it with Bazelisk, a user-friendly wrapper for Bazel written in Go that makes managing Bazel installations and builds much easier.
Bazelisk automatically reads your .bazelversion file (if you have one), finds a suitable version of Bazel, downloads it from the official server if necessary, and then transparently passes through all command-line arguments to the real Bazel binary. If you checked out the source code above, you'll see in the .bazelversion file in the root of the project that we're using 7.4.1 for this example (and you'll eventually see Bazelisk install that version for you).
Wait—don't I need Python also?
Bazel does its best to isolate the build environment, which generally includes making sure all dependencies, like the correct version of Python, are installed and available to builds that require them. You can define a dependency like the one on Python, for example, in the MODULE.bazel file in the root of your repo, as we do in this example. We're using Python 3.11, which you won't need to install for building—Bazel will manage it automatically as a dependency.
If you want to, you can bypass the MODULE.bazel settings and configure Bazel to depend on the versions of Python and other tools available on your system, but generally, that's not recommended. You can read more about Bazel modules in the official docs.
Bazel extensions
The MODULE.bazel.lock file in the root directory tracks and locks all of the Bazel extensions on which your project depends. It's automatically managed by Bazel; you generally don't need to edit it by hand, but it's good to know about. Bazel has many stable Python-specific extensions, some of which have been accepted into the rules_python library that we'll be using.
Initialize and set up your project
In our project directory, you'll see an existing pair of .bazelversion and MODULE.bazel files, so if you have Bazelisk installed and you run the bazel command in the root directory of the project, you'll see Bazel 7.4.1 installing itself:
bazel

Extracting Bazel installation...
Starting local Bazel server and connecting to it...
[bazel release 7.4.1]
If you're starting from scratch rather than using the sample code, create these files manually:
echo "7.4.1" > .bazelversion
touch MODULE.bazel
Then, you can add some basic definitions into the MODULE.bazel file. Here's what we're using:
# MODULE.bazel

bazel_dep(name = "rules_python", version = "1.0.0")

pip = use_extension("@rules_python//python/extensions:pip.bzl", "pip")

pip.parse(
    hub_name = "pip",
    python_version = "3.11",
    requirements_lock = "//app:requirements_lock.txt",
)

python = use_extension("@rules_python//python/extensions:python.bzl", "python")

python.toolchain(
    ignore_root_user_error = True,
    is_default = True,
    python_version = "3.11",
)
The first line essentially tells Bazel to pull in Bazel support for building projects with Python. We define which versions of Python and pip we'll be using by referencing the relevant Bazel extensions in two use_extension calls, both of which reference the included rules_python library. These commands tell Bazel to make the pip and Python extensions available for use inside our builds. rules_python is a core library that contains all of the supported Python extensions and build rules for Bazel. Every line that starts with py_ in this post references a build rule provided by Bazel.
At the bottom of the file, we have two calls to use_repo to tell Bazel that we may want to access more than just the pip and python commands from each of the respective extensions:
# MODULE.bazel
# ...

use_repo(pip, "pip")
use_repo(python, "python_3_11")
Why use use_repo? Won't the build succeed without it?
Bazel is particularly good at guaranteeing build hermeticity. Each Bazel build can be as hermetic as you want, up to and including being fully isolated from the system environment where it's running. By default, when we use Bazel extensions, we won't have access to their internals. use_repo grants us access to the build targets from an extension, in this case, some of the internal commands from the pip and Python extensions (and you'll see us, for example, use the requirement rule from pip farther down: load("@pip//:requirements.bzl", "requirement")).
A hermetic build, by the way, can also be safely sandboxed, meaning it can be run in an environment with no access to the internet, to your runtime systems, or to specific knowledge of what's being built on top of it. See the docs for more information.
Defining the build targets for a Python library
Inside the package directory, we've defined a Python library called hello.py. It contains only two lines:
def say_hi():
    return "Hi!"
You can double-check that it builds correctly for you, if you've checked out our source code, by running the following command:
bazel build //package:hello

Starting local Bazel server and connecting to it...
INFO: Analyzed target //package:hello (5 packages loaded, 9 targets configured).
INFO: Found 1 target...
Target //package:hello up-to-date (nothing to build)
INFO: Elapsed time: 3.300s, Critical Path: 0.01s
INFO: 1 process: 1 internal.
INFO: Build completed successfully, 1 total action
You'll see that the package is built using the convenient Python building framework hatchling, and has some basic Python library definition details in the pyproject.toml file (all of which will likely be familiar to you already):
[project]
name = "hiworld"
version = "0.0.1"

[build-system]
requires = ["hatchling"]
build-backend = "hatchling.build"
Bazel knows how to interpret the contents of this file to build with internal dependencies that might be used elsewhere in the project. Bazel builds are defined in one or more BUILD.bazel files—one for each project that gets built. These files are the Bazel equivalents of a Makefile, and Bazel provides a library of build rules that you can use to populate them.
Let's first look at how to define a Python library project with a BUILD.bazel file. Below, we call a few Bazel-provided rules to define some targets:
# package/BUILD.bazel

load("@rules_python//python:defs.bzl", "py_test")
load("@rules_python//python:packaging.bzl", "py_wheel", "py_wheel_dist")

py_library(
    name = "hello",
    srcs = ["hello.py"],
    visibility = ["//visibility:public"],
    deps = [],
)

py_wheel(
    name = "hello_wheel",
    distribution = "hello",
    version = "0.0.1",
    deps = [],
)

py_wheel_dist(
    name = "hello_wheel_dist",
    out = "dist",
    wheel = ":hello_wheel",
)

py_test(
    name = "hello_test",
    srcs = ["hello_test.py"],
    deps = [
        ":hello"
    ],
    imports = ["."],
)
Bazel automatically transforms the name property for each build target into a build command. Let's walk through the targets we're defining for our package, what they do, and how to use them:
py_library
Python library build targets are defined with the py_library build rule. (We'll go into the differences between py_library and py_binary later.) Bazel executed this rule when you ran bazel build //package:hello earlier. Note that the library is available by default only to Bazel targets in the same Bazel package. By marking the visibility as public, we allow other packages in the repository to see and use it.
py_test
This tells Bazel where the test files for this project are located. You can run it from the root directory with bazel test to see the results:
bazel test //package:hello_test

INFO: Analyzed target //package:hello_test (1 packages loaded, 2161 targets configured).
INFO: Found 1 test target...
Target //package:hello_test up-to-date:
  bazel-bin/package/hello_test
INFO: Elapsed time: 0.253s, Critical Path: 0.01s
INFO: 1 process: 1 internal.
INFO: Build completed successfully, 1 total action
PASSED: //package:hello_test (see /private/var/tmp/_bazel_cnunciato/91877609f582aac2a59896b10bfc8689/execroot/_main/bazel-out/darwin_arm64-fastbuild/testlogs/package/hello_test/test.log)
INFO: From Testing //package:hello_test
==================== Test output for //package:hello_test:
.
----------------------------------------------------------------------
Ran 1 test in 0.000s

OK
================================================================================
//package:hello_test                                            (cached) PASSED in 0.7s
py_wheel and py_wheel_dist
These two commands conspire to build and store the Python wheel for this package. You can see that py_wheel_dist references wheel = ":hello_wheel", the wheel we're building with py_wheel just above. If you run either of these, you'll start to see some build artifacts being produced:
bazel build //package:hello_wheel_dist

INFO: Analyzed target //package:hello_wheel_dist (2 packages loaded, 36 targets configured).
INFO: Found 1 target...
Target //package:hello_wheel_dist up-to-date:
  bazel-bin/package/dist
INFO: Elapsed time: 1.957s, Critical Path: 1.72s
INFO: 13 processes: 11 internal, 2 darwin-sandbox.
INFO: Build completed successfully, 13 total actions
You'll find the resulting build artifacts in bazel-bin:
ls bazel-bin/package/

dist
hello_wheel_target_wrapped_inputs.txt
hello_wheel.metadata.txt
hello_wheel.name
hello-0.0.12-py3-none-any.whl
The wheel itself (by way of py_wheel_dist) is copied to bazel-bin/package/dist:
ls bazel-bin/package/dist

hello-0.0.12-py3-none-any.whl
Running the build command for hello_wheel_dist also builds all of its dependencies (in this case, hello_wheel), and Bazel will generate both the .whl file and the dist directory.
What is bazel-bin—and these other bazel-* directories?
Each time you run bazel build, Bazel checks to see if you have any cached build artifacts, and only creates them if they're missing. Typically, you'll see four directories added to the root of your project after a Bazel build. For example, for our project:
- The build environment, at
bazel-bazel-python-package-example - Its build artifacts, at
bazel-bin(as referenced above) - The output generated during builds, at
bazel-out - Test-related logs, at
bazel-testlogs
If you look closer, you'll see that these directories are all symlinked to a common sandbox elsewhere on your machine; Bazel makes them available to you at the project level for convenience:
ls -al bazel-*
bazel-bazel-python-package-example -> /private/var/tmp/_bazel_cnunciato/91877609f582aac2a59896b10bfc8689/execroot/_main
bazel-bin -> /private/var/tmp/_bazel_cnunciato/91877609f582aac2a59896b10bfc8689/execroot/_main/bazel-out/darwin_arm64-fastbuild/bin
bazel-out -> /private/var/tmp/_bazel_cnunciato/91877609f582aac2a59896b10bfc8689/execroot/_main/bazel-out
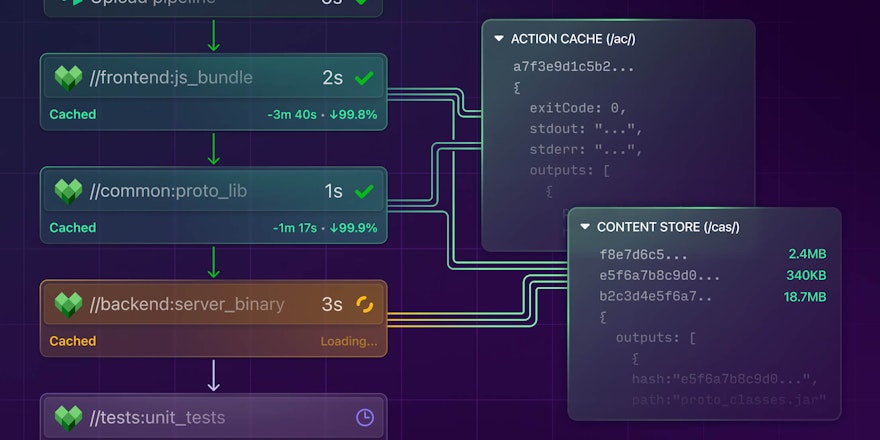
bazel-testlogs -> /private/var/tmp/_bazel_cnunciato/91877609f582aac2a59896b10bfc8689/execroot/_main/bazel-out/darwin_arm64-fastbuild/testlogsBazel uses these directories to implement caching and incremental builds. Each build target keeps a cache in these directories, which is only updated if relevant changes are detected in the build. If targets depend on each other, only the dependencies that have changed since the last build get rebuilt.
What's the difference between py_library and py_binary?
Binary and library are terms used by Bazel to keep track of which code should be made executable and which shouldn't. In the context of Python, where the difference between a library and a directly executable file isn't as clear as with other languages, Bazel uses the distinction to know which files should be marked as executable at an OS level, and which it should try to execute during testing and for builds.
Defining a Python application that uses the library
Now that you've built a Python library package, you'll almost surely want to use it in a Python application. In the app directory, you'll find an example that defines a basic Python app that calls a function from the hello package and uses the same function in a Python test. The app also uses a requirements.txt file to show how to include third-party libraries (here, termcolor, just as an example) in Bazel builds as well.
Here's the app's BUILD.bazel file:
# app/BUILD.bazel

load("@rules_python//python:defs.bzl", "py_binary", "py_test")
load("@pip//:requirements.bzl", "requirement")
load("@rules_python//python:pip.bzl", "compile_pip_requirements")

py_binary(
    name = "main",
    srcs = ["main.py"],
    deps = [
        "//package:hello",
        requirement("termcolor"),
    ],
)

py_test(
    name = "main_test",
    srcs = ["main_test.py"],
    deps = [
        ":main"
    ],
    imports = ["."],
)

compile_pip_requirements(
    name = "requirements",
    requirements_in = "requirements.txt",
    requirements_txt = "requirements_lock.txt",
)
The commands should be starting to look familiar:
py_binary
Just like py_library gives us library build configuration details, here we have instructions on how to build a Python executable program (not literally a binary, as we explained above). You can run it to see the application build:
bazel build //app:main

INFO: Analyzed target //app:main (7 packages loaded, 2198 targets configured).
INFO: Found 1 target...
Target //app:main up-to-date:
  bazel-bin/app/main
INFO: Elapsed time: 2.796s, Critical Path: 0.25s
INFO: 5 processes: 5 internal.
INFO: Build completed successfully, 5 total actions
py_test
The py_test rule defines a test-running build target and command for the app, similarly to how it defined a target for the library:
bazel test //app:main_test

INFO: Analyzed target //app:main_test (1 packages loaded, 2165 targets configured).
INFO: From Testing //app:main_test:
==================== Test output for //app:main_test:
================================================================================
INFO: Found 1 test target...
Target //app:main_test up-to-date:
  bazel-bin/app/main_test
INFO: Elapsed time: 1.314s, Critical Path: 1.01s
INFO: 6 processes: 4 internal, 2 darwin-sandbox.
INFO: Build completed successfully, 6 total actions
//app:main_test                                                          PASSED in 0.6s
compile_pip_requirements
This build rule defines a Bazel command to regenerate the requirements.lock file, which ensures that the package's Python dependencies remain consistent. It'll be run automatically by Bazel whenever the requirements.txt file changes, but you can also just run it by hand:
bazel run //app:requirements.update

INFO: Analyzed target //app:requirements.update (15 packages loaded, 988 targets configured).
INFO: Found 1 target...
Target //app:requirements.update up-to-date:
  bazel-bin/app/requirements.update
INFO: Elapsed time: 0.592s, Critical Path: 0.35s
INFO: 5 processes: 5 internal.
INFO: Build completed successfully, 5 total actions
INFO: Running command line: bazel-bin/app/requirements.update '--src=_main/app/requirements.txt' _main/app/requirements_lock.txt //app:requirements.update '--resolver=backtracking' --allow-unsafe --generate-hashes
Updating app/requirements_lock.txt
Putting it all together: building and running the app
Of course, once the entire project is defined and wired up, you can build, test, and iterate on it as an entire project, without having to rebuild each target and dependency individually. Bazel ensures that only the targets that have changed are rebuilt from one CLI invocation to the next.
To build the entire Bazel repository, run bazel build //...:
bazel build //...

INFO: Analyzed 9 targets (1 packages loaded, 2187 targets configured).
INFO: Found 9 targets...
INFO: Elapsed time: 0.620s, Critical Path: 0.34s
INFO: 5 processes: 5 internal.
INFO: Build completed successfully, 5 total actions
To test the entire repository, use bazel test //...:
bazel test //...

INFO: Analyzed 9 targets (0 packages loaded, 0 targets configured).
INFO: From Testing //app:requirements_test:
...
INFO: Found 6 targets and 3 test targets...
INFO: Elapsed time: 1.687s, Critical Path: 1.54s
INFO: 2 processes: 2 local.
INFO: Build completed successfully, 2 total actions
...
==================== Test output for //package:hello_test:
.
----------------------------------------------------------------------
Ran 1 test in 0.000s

OK
================================================================================
//app:main_test                                                 (cached) PASSED in 0.6s
//package:hello_test                                            (cached) PASSED in 0.7s
//app:requirements_test                                                  PASSED in 1.5s
You can also run the Python application with Bazel directly:
bazel run //app:main --ui_event_filters=-INFO --noshow_progress --show_result=0

The Python package says, 'Hi!'
And there you go! You're now up and running with a fully-functioning (if admittedly fairly simple) Python monorepo managed with Bazel.
Next steps
You're now one step closer to expertly navigating the not-so-trivial world of managing Python projects with Bazel. Huzzah!
Did you know that Buildkite makes working with Bazel even better? With Buildkite, you're not only able to run Bazel in all of the ways we've covered so far, but go several steps farther:
- You can upload your Python libraries to Buildkite Package Registries, which has built-in support for PyPI repositories (among many others)
- You can identify and fix flaky tests with Buildkite Test Engine
- You can even use Bazel itself, in combination with Python (or any language), to drive your build and deployment workflows dynamically with Buildkite Pipelines
To keep the learning going, we suggest:
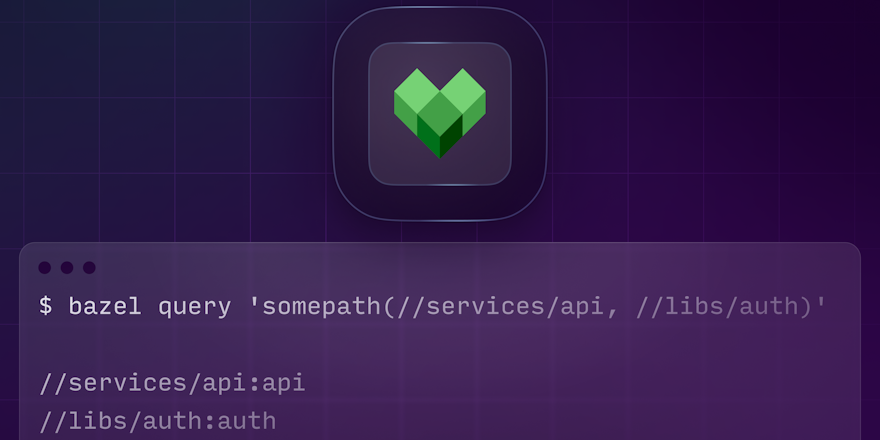
- Getting familiar with how Bazel makes it easier to inspect, navigate, build, and test complex Bazel projects with
bazel query - Kicking the tires with Bazel and Buildkite in tandem with a simple hands-on tutorial
- Having a look at how the Bazel team at Google uses Buildkite to ship Bazel
How Bazel built its CI system on Buildkite
Register to watch the webinar
- Recorded on
- March 17, 2025
- Length
- 19 minutes